Installation
From Newsbin
Quick Links: Version 5 Documentation | Version 6.60 Documentation | Newsbin Home | Latest Newsbin Release | Glossary | Newsbin Forums
Contents |
Installing NewsBin
About the Installer
The NewsBin installer is an executable file with a name like nb530-install.exe. It checks for an existing installation of NewsBin and will give you the option to upgrade if you already have NewsBin installed. You do not need to uninstall a previous version to upgrade. Choosing to upgrade will keep all your current settings unless otherwise stated in the release notes.
If this is a new installation, the installer copies the NewsBin program files to the folder of your choosing.
Run the Installer
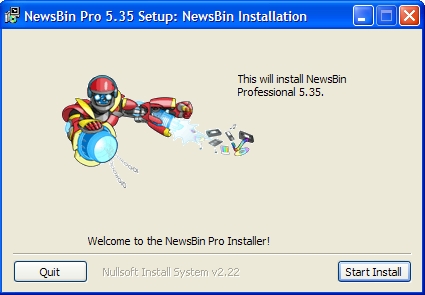
After you download the installer and run it, the first screen you see is this:
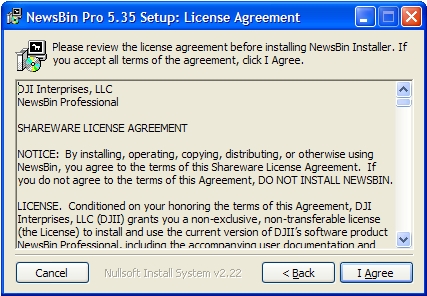
You can quit if you want but hopefully you'll click "Start Install" and proceed to the License screen:
Feel free to read the license. The key points are that this is a trial version that you are welcome to use for 10 days. After 10 days, we ask that you register if you are happy with the program. Upon registration, you will receive a key that will turn your trial version into the registered version. They key is good for up to 3 different machines. If you use it on more than 3 different machines (not 3 times, 3 different machines) then your key will be locked and you will either have to buy another one or beg us to unlock it. OS re-installs look like a new machine to our key server and we try to allow a few re-installs per year.
Click the "I Agree" button to indicate you understand the conditions of the license.
Installer Options
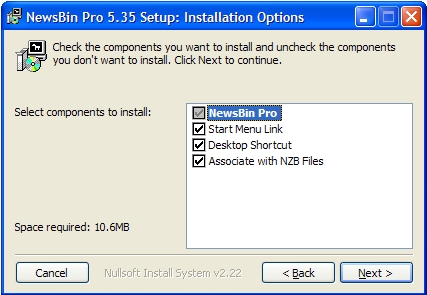
The installer gives you the option to
- Include Start Menu Links - under All Programs/NewsBin5 including links to help files and the uninstaller.
- Create Shortcut on the Desktop - to launch NewsBin from your Desktop
- Associate NZB Files - so you can process NZB files with NewsBin by double-clicking on them
Installation Folder Selection
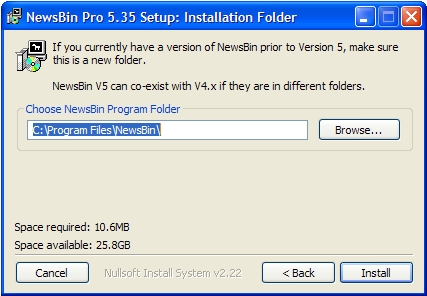
The next screen gives you the option to select an installation folder. If an older version of NewsBin (Version 5 series only) is installed, then the current installation folder will be listed. Otherwise a default folder will be listed, which you can change if you like.
First Time Installation
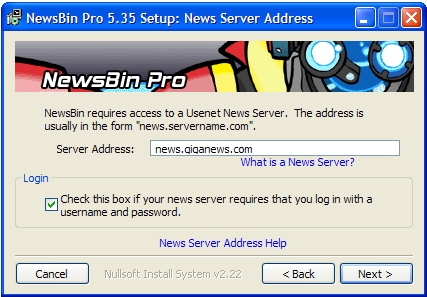
If this is the first time NewsBin has been installed on this machine, you will not receive any upgrade options and the Installer will begin the installation after you select your installation folder. After the initial program files are extracted, a screen asking you for your News Server address will be displayed:
A valid news server address is critical to NewsBin operating properly. The news server address usually starts with the word "news". Make sure you do not use "www". This is Usenet, not the web. If you don't know your news server address, first check our ISP News Server Addresses page to see if your Internet Provider is listed and offers news server access. If your ISP is not listed, you can either contact them and ask them what their news server address is or, sign up for a Premium News Service Provider for a monthly fee.
If you are sitting there wondering what Usenet or a news server is, please read our New_to_Usenet section.
To download from usenet you need to have a server, like Astraweb. Some ISP's do not require a username and password so you can leave that box unchecked if you know a password is not required. When you have entered the information, click the "Next" button.
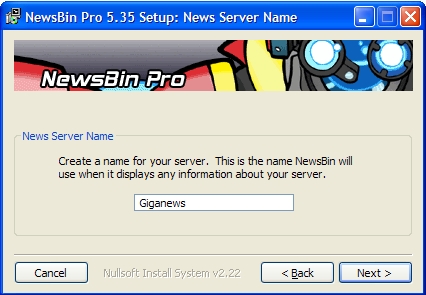
This screen lets you create a name for your news server. It is only for display purposes within NewsBin. The default is "My_Server" but since I'm using my Giganews server here, I'm going to enter "Giganews".
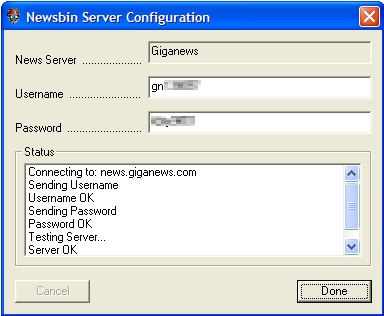
If your news server requires a password, the next screen will test your news server login information:
On this screen, enter the username and password provided to you buy your news service, then hit "Test". If the login information is correct, the button will switch to say "Done" as shown in the image above.
We do not run a news service and we do not know your username and password. If you have lost this information, or don't know what it is, either contact your news service provider if you are paying for service or, contact your ISP if you are using your Internet Provider's news server. Some ISP's do not require a username and password as long as you are on their network.
If you have an error, the messages in the Status window should give you an idea of the problem. If the test times out, then either the news server address was entered incorrectly or, a firewall may be blocking the test program's access to the news server. Help with troubleshooting connection problems is in our Troubleshooting FAQ.
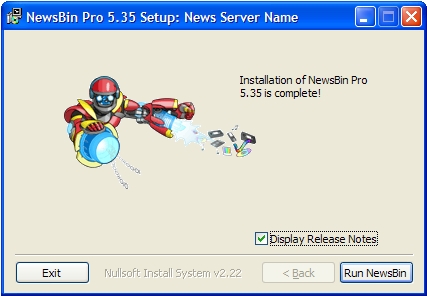
Click "Done" to finish the installation. You will then see the final screen for the installer:
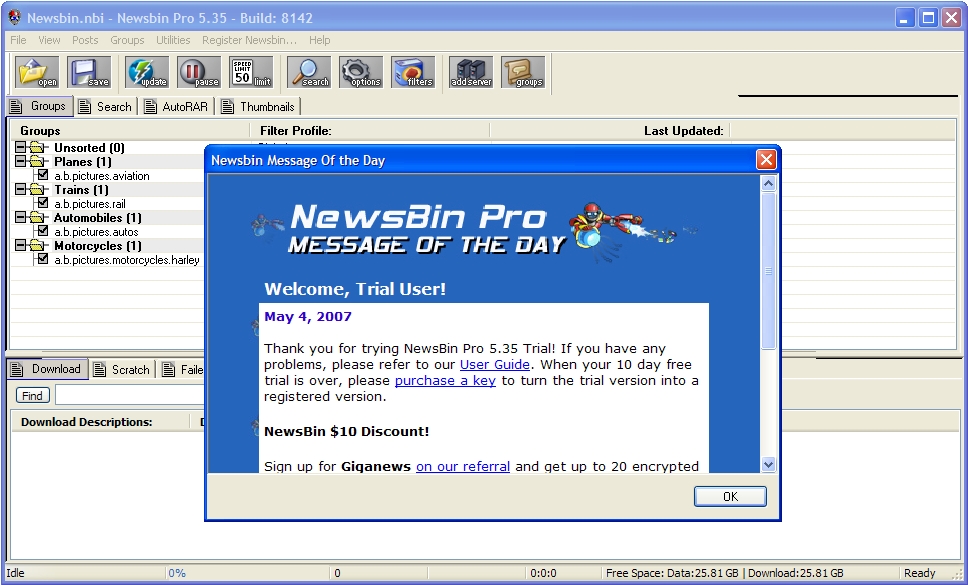
Click "Run NewsBin" to run NewsBin now. If you keep the "Display Release Notes" selected, your text editor will pop up showing the Release Notes containing details about new features, bug fixes, and known issues. Please read at least the first section pertaining to the current release in case there are known issues you should be aware of. After you close your text editor, you may see the NewsBin splash screen counting down indicating how many days of your trial are left. You will then see the Message of the Day (MOTD) screen that keeps you informed of new releases and information we think you may find interesting.
There are 3 types of toolbars along the top of NewsBin. This screenshot shows the icon toolbar only. You can toggle the toolbars on or off under the View menu.
After you click "OK" on the MOTD, NewsBin will start and will have some example newsgroups pre-configured in some example Group of Groups folders: Planes, Trains, Automobiles, and Motorcycles. The "Unsorted" folder is the default folder where any additional groups you add are placed. You can move groups out of the Unsorted folder by click and drag.
If you want to add a newsgroup, see the Group Configuration section.
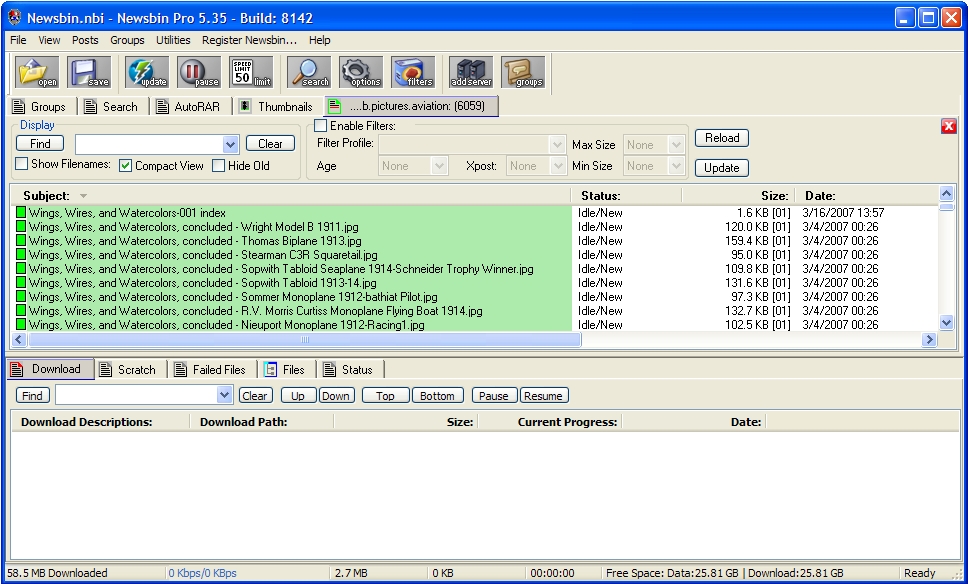
To get you started downloading your first files, you first need to download Headers so you can see what Posts are available in this group. Do this by double-clicking on one of the newsgroups from the Groups tab. You will see something like this:
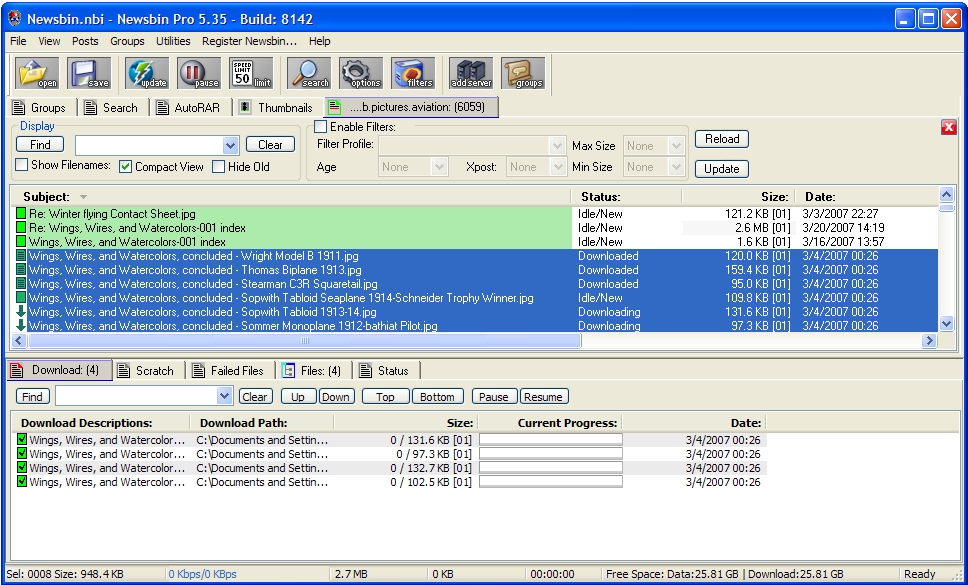
To download a file, you can either click the checkbox to the left of the subject in the post list (has the name of the newsgroup as the label in the tab) or, select a block of posts and hit ctrl-e to add the posts to the download list. If you are a mouse person, right click on a post or block of selected posts and select "Add to Download List". You will see the posts show up in the Download list like this:
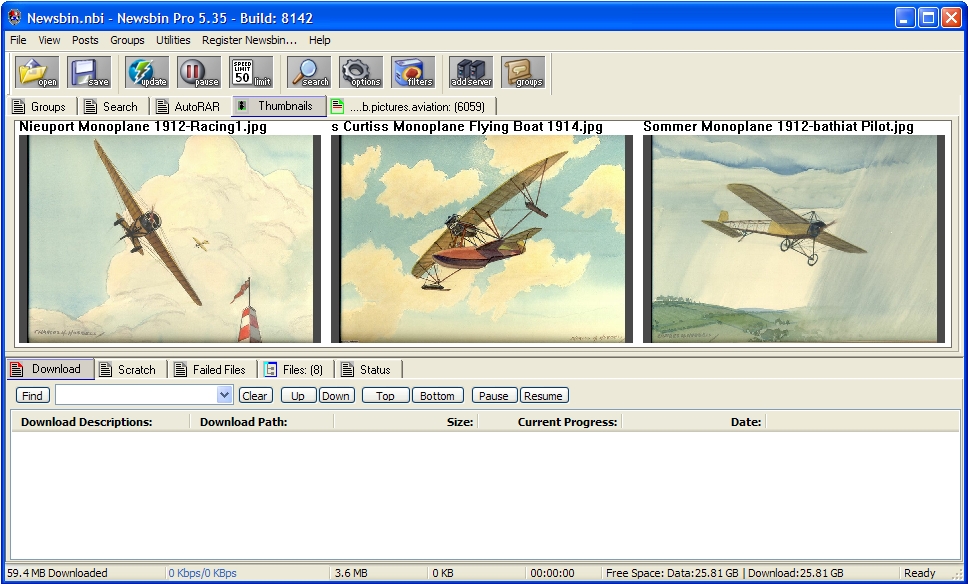
If you are downloading images, click on the "Thumbnails" tab to see a smaller representation of each image after they are downloaded. You can get the full size image by double-clicking on the thumbnail image or, go to the "Files" tab and double-click the file to launch your image viewer. You can resize the panes in NewsBin to best fit your use by clicking and dragging between panes. You can increase the number of Thumbnails to display under Options/Setup.
Here is an example of NewsBin showing thumbnail images of the files submitted for download in the last screenshot.
So now you know the basics for getting started. Downloading files other than images is just as easy, they just take longer because they are probably bigger. As files download successfully, they are listed in the Files tab. If you have installed an application that knows how to handle the file, for example JPG, MP3, or MPG, then just double-click on the file from the Files tab and the appropriate application will be launched to play/display the file.
Play with some of the options and use this help site for more detailed explanations of how the many options and settings work. A detailed breakdown of every setting is available from the Option Detail area.
Upgrading
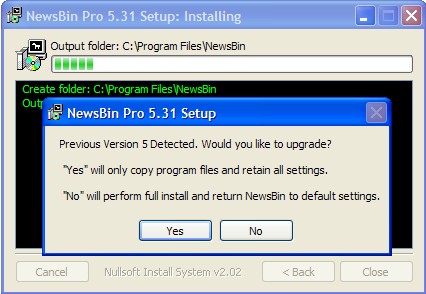
If the installer detects that NewsBin (Version 5 only) is already installed, you will be given the option to upgrade. Choosing this option updates the program and will not change any of your existing settings.
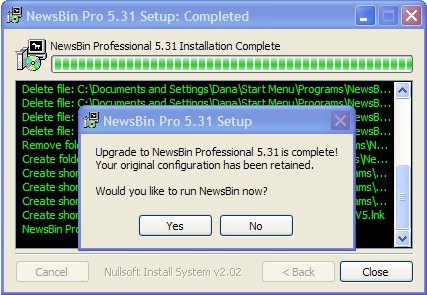
When the upgrade completes, you can either run NewsBin immediately, or choose not to launch NewsBin and use the desktop shortcut later. If you choose to run NewsBin, the release notes will be displayed using your default text viewer so you can see a list of the most recent changes and known issues.
Configuring NewsBin
After initial installation, there are a few more configuration settings that need to be performed before you can use NewsBin for the first time.
Newsbin Configuration File
The majority of the settings that Newsbin uses are saved in the Newsbin configuration file. This is a file with a .NBI file extension. The default location for this file is under the current users profile (typcially stored under "Documents and Settings/username". Many users prefer to save this file in an alternative location so it is easier to find for purposes such as backup.
If your computer crashes for any reason it is possible (albeit unlikely) to lose the contents of the Newsbin configuration file. It is always a good ide, therefore, to make a backup of this file after you have made any significant changes.
Group Configuration
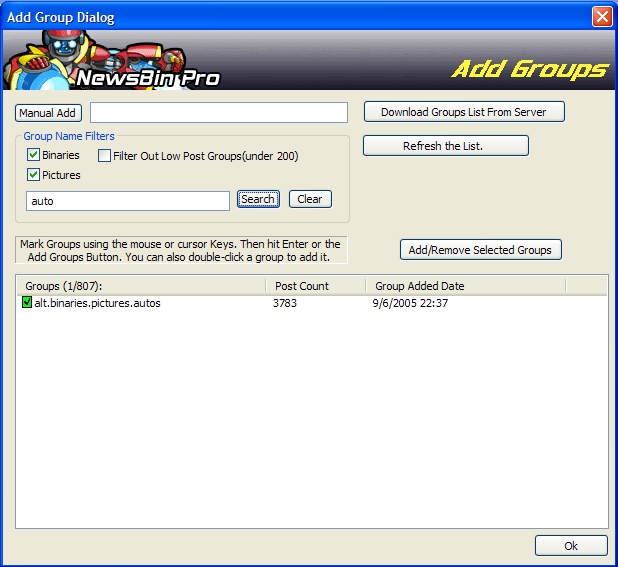
To add newsgroups (subscribe), click the "Groups" button on the toolbar or the "Edit Subscribed Groups" button if you are running the graphic toolbar (last one on the right). This will display the Add Group dialog and allow you to choose newsgroups of interest.
NewsBin comes with a default list of popular newsgroups. You can either use these or, click the "Update Groups From Server" button to retrieve the list of newsgroups for your server. If you have multiple servers configured, all groups from all servers are downloaded.
There are some built in Group Name Filters to help you narrow down the groups list easily. You should always have "Binaries" selected because that is what NewsBin was built for, downloading from binary newsgroups. You can also select "Pictures" to further filter the list down to display only newsgroups typically used for posting pictures. The "Filter Out Low Post Groups" will hide any low traffic groups, mostly garbage groups that you probably won't have interest in.
To choose a newsgroup, either double-click on the newsgroup of interest or click the checkbox to the left of the group. After you choose your newsgroups, click the "Ok" button and your groups will be added to the Groups tab in a folder called "Unsorted". You can create your own folder name by right-clicking in the Group tab and choosing "New Folder". Then click and drag your groups onto the folder to organize them. All this is optional, you can keep everything in your "Unsorted" folder if you wish.
In this example, I have selected "Binaries" and "Pictures" to narrow down the types of newsgroups displayed. I then further isolated my interest by typing in the word "auto" and hit the "Search" button. I then clicked in the checkbox to the left of the group name to add this group to the NewsBin "Subscribed Group List" which is listed in the "Groups" tab on the left side of the program.
Popular Options
There are many options in NewsBin that have been implemented upon user request over the years. Here are some of the most popular options:
Download Folder Options
NewsBin can help you organize files you download by creating a folder named based on the newsgroup the file was downloaded from. Set this under Options/Filename Options using "Folder Mode". If you download MP3 files, there are options to create folder based on the Artist and Album tags in the MP3 file (Version 5.30 and above only). If you download from NZB Files, you have additional folder naming options under Options/NZB Options.
Automatic Download Mode
Some people want to blindly download everything in a newsgroup without having to manually select items. This can be wasteful if you do this in large multimedia groups but, for smaller picture groups, this can be a good feature. You can set automatic download mode per group by right-clicking on the newsgroup and select "Properties" then "Automatic Download Mode". With this set, whenever you download headers for the group, you will also download any file attachments.
Muli-Tab Mode
If you like to process multiple newsgroups at the same time, enabling "Multi-Tab Mode" under Options/Switches creates a separate tab for each newsgroup you load.
Minimize to System Tray
This option is off by default. If you want NewsBin to go to the system tray when minimized, you can turn this on under Options/Advanced.
Increasing Thumbnails
You can increase the number of thumbnails that NewsBin will display in the Thumbnails tab under Options/Setup.
Server Configuration
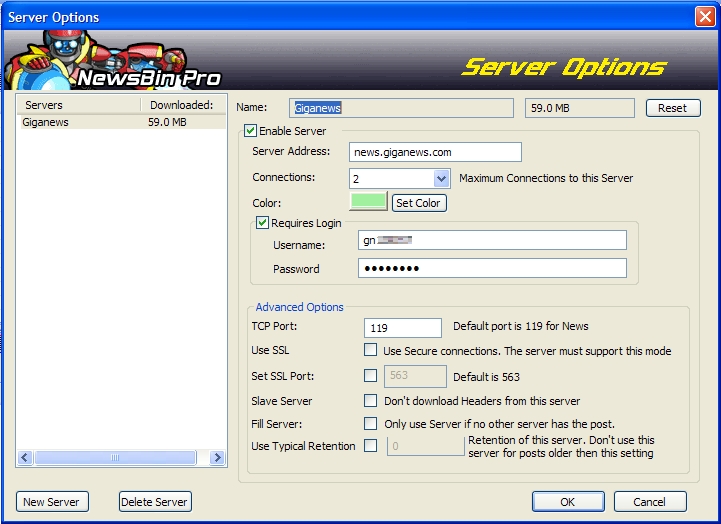
If you want to adjust your news server options or, configure NewsBin to use multiple news services, you click the Add Server button on the Icon Toolbar (2nd to last button) or the "Servers" button if you have the "Button Only Toolbar" enabled (under the View menu). The screen below will be displayed asking for your server information.
Option Descriptions:
- Enable Server: Check this box to enable the server for use. If it is not checked, NewsBin will not attempt to connect to the server.
- Name: Your own name for this server. Can be anything but avoid punctuation and spaces. You can only set this field when you add a server, you cannot modify it once a server entry has been created.
- Server Address: The address of your news server. Usually in the format "news.myisp.com" where "myisp" is your ISP's name. There is a list of news server addresses for many of the popular ISP's here. If you don't have a news service (this is required if you want to use NewsBin) then sign up for one of our NewsBin Recommended News Services.
Note: If you are a Giganews user and using the Giganews Accelerator, then set a value of 127.0.0.1 here to direct Newsbin to the Giganews Accelerator. - Connections: This is where you set the number of connections NewsBin will use for downloading. The default is 2. Set it to as many as necessary to get your full bandwidth. The max is 30 per server but only people who have a per connection speed limit would ever have a need to go that high. You should be able to max out most high speed connections with only 4 connections.
- Color: Set the color to anything except Black, White, Red, Gray, of Green. Those are reserved colors that have different meaning in the progress bars. More information about these colors are in the Progress Bar section.
- Requires Login, Username, and Password: Set these if your server requires a login. Most ISP's do not, all pay servers do. If you don't set this and receive Authentication errors when you try to download (you'll see this in the Status tab) then you do need to supply a username/password. Some ISP's use your email address and email address password, other's supply specific usernames and passwords. You'll have to check with your ISP if you aren't sure.
Advanced Options
For first time use, none of these settings need to be modified. Once you are comfortable using NewsBin and want to get more performance, or are using multiple servers, then these settings help.
- TCP Port: The default of 119 should not be changed unless you are running through a tunnel, proxy, or using an alternate port. If you are interested in running on an alternate port to try to get around a firewall or bandwidth limiting by your ISP, you can learn more about it in the Using Alternate Ports section.
- Use SSL: If your news server supports SSL (also referred to as NNTPS when used for news servers), select this option and all traffic will be encrypted using SSL. SSL is not supported by all servers, and typically cost extra to use. Use it if you want to make it virtually impossible to eavesdrop on the traffic between your PC and news server and you are paranoid enough to pay the premium price normally charged for SSL.
Note: If you are a Giganews users using the Giganews Accelerator, then set up Newsbin as though you were NOT using SSL and the Giganews Accelerator will do the conversion to SSL. - Set SSL Port: Use this if you need to connect on a non-standard SSL port. When you enable "Use SSL", it automatically uses the standard port for NNTP over SSL which is 563. *Slave Server: If you have multiple news servers, use this setting if you don't need NewsBin to download headers from this server. This will minimise the amount of headers that you download. In general, your best server should not have this set so you get the most available headers. If you only have 1 server, you must have this turned off if you plan to download headers.
Note: A server that does not have the Slave server option set is shown as a Master server. - Fill Server: If you have a metered server and want to minimize the amount that is downloaded from it, use this option so NewsBin will only use it to download file parts if no other servers have the post. This setting is not relevant if you are using an unlimited service.
- Use Typical Retention: Set this to the number of days of posts that your news server typically stores. This is only useful if you run multiple servers with varying retention. The setting tells NewsBin not to even try to download from the server if a post is older than the "Typical Retention" and will save you from seeing lots of red in your progress bars indicating download errors from this server.
Buttons
- New Server: This button allows you to add an additional server for NewsBin to use. It will first prompt you for a server name (can be anything you want) and give you the option to copy the settings of an existing server as a starting point. You can then modify any of the above options for this server. Make sure the server you wish to modify is highlighted in the Servers list first.
- Delete Server: Highlight a server in the Servers list and hit this button to delete the server.
- Reset: The Reset button in the upper right hand corner of the Server Options Screen will reset the count of bytes downloaded from the selected server. You can click on each server in your servers list to see the amount downloaded from it in the box immediately to the left of the Reset button. In this example, it shows that 59MB has been downloaded from the Giganews server.
Organizing the Newsbin Screen Layout
Newsbin 5 includes facilities for customizing the way that information is organized for display purposes:
- The initial layout of Newsbin just after installation is based on a 3-pane approach that has evolved over time to be an efficient manner of working. However there are many users who may prefer a 1 or 2-pane approach, either because they are short of screen space or simply to suit their personal preferences. It has been found that for new users the 2-pane method (top and bottom) seems to be the more intuitive, so on new Newsbin installations this is now the default pane layout.
- Newsbin has a lot of tabs holding different types of information. The initial installation of Newsbin will have provided a default allocation of tabs to panes, and also of which tabs are visible.
- Some users prefer different colors and/or fonts to the default ones that are used.
Changing Panes Visible
You can change which panes are visible in two ways:
- Dragging the divider between the panes to one extreme of the screen. If you want to hide one off the top two panes then it is probably best to hide the Leftmost one. This is because if you try and hide the right-most one it may re-appear on a Newsbin restart due to some checks related to Newsbin being moved off the visible screen area.Note also that if you want to permanently hide a pane you probably want to make sure that there are no tabs associated with that pane or you may wonder where those tabs have disappeared to!Having said that, the latest Newsbin releases default to using a 2 pane mode on installation. To get back to 3-pane mode you need to:
- Go to the extreme right of the screen to drag the pane divider to the left to make the top right pane visible again.
- Assign whatever tabs you want at the top right via Options->Window Positions.
- Exit/restart Newsbin to make the change active
- Use of the Alt-1, Alt-2, Alt-3 keyboard shortcuts. These can be more useful at times than the drag method mentioned above as they act as toggles which can rapidly be applied/removed. This is of particular use when you temporarily want more space for a particular pane.There seems to be a bug that sometimes if you use Alt-2 followed by Alt-3 you cannot get back to the original pane configuration. If this happens you will have to use the method of dragging the dividers to get back all 3 panes again.
Controlling where Tabs appear
The linkage of tabs to the panes in which they will appear can be altered using the Windows Positions facility under the Newsbin Options. Once you have made changes to where you want the tabs to appear you have to exit/restart newsbin to make the chnages active.
There is (currently) at least no way (currently at least) to control the tab order within a particular pane.
Once tabs have been allocated to the Panes the other question is whether they should be visible or not in the first place. Some tabs are deemed so important (e.g. Servers, Groups, Download etc) to the base functionality of Newsbin that no facility is provided for hiding them. However a large number of other tabs that are less critical (Status, Thumbnails etc) can have their visibility toggled via the View menu. The visibility will be remembered across Newsbin exit/restarts until the user actively changes it again.
Setting Colors/Fonts
- Post Lists:
These can have their details set via the Fonts/Colors tab in the Newsbin Options. This allows for different combinations according to the status of individual posts. - Other Tabs:
Many of the other tabs have the option to set the font for that specific tab as an entry on the right-click menu.
